
Top Tips: Photographing Highly Reflective Surfaces with the Crime-lite AUTO
A Glaring Issue
Bright lighting is often integral to detecting and photographing evidence at the crime scene, however the range of surfaces encountered can cause challenges when attempting to detect evidence or capture accurate and detailed photographs using strong illumination.
Faced with reflective or wet surfaces, investigators often find that the bright lights used for visualisation are scattered by the surface and redirected back towards the camera, causing specular reflections, known as glare.
There are countless examples of evidence types that may be hard to capture at a scene due to glare, including fingermarks on glass, footwear marks on a polished tile floor, or even tool marks on a painted surface.
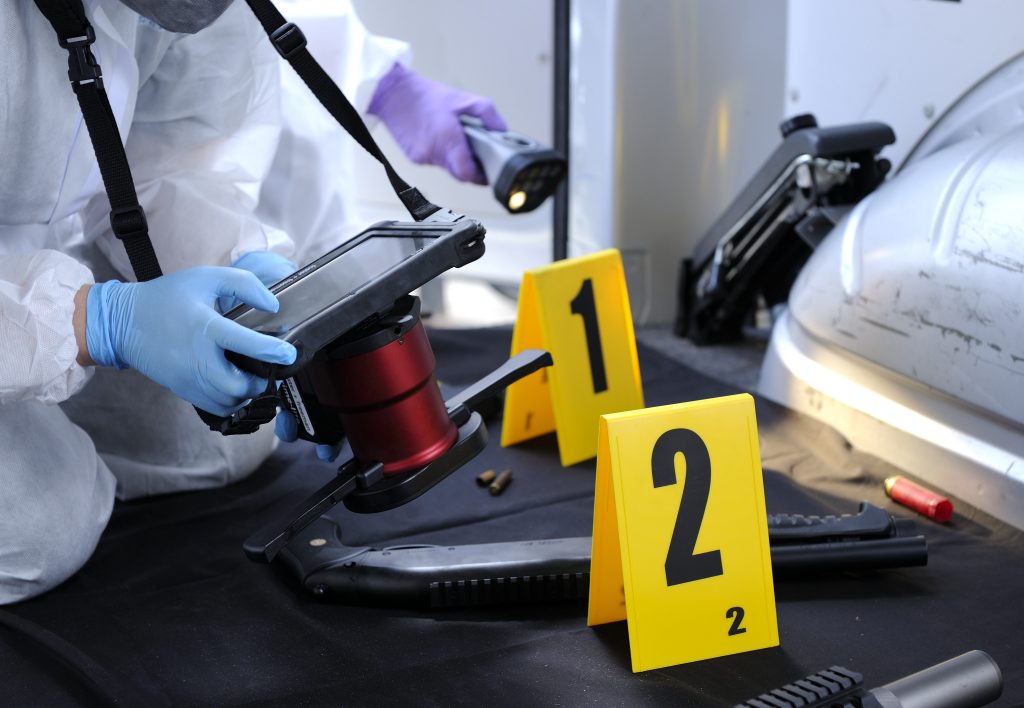
The Crime-lite AUTO reduces glare when visualising and capturing evidence through magnetic polarising filters, designed to be easily attached to the device when needed. Alongside built-in light sources, automated filters, and a scientific-grade camera to record evidence, these polarising filters help to make the Crime-lite AUTO the ultimate all-in-on search and capture tool at the crime scene.
Read on as we share our three top tips for photographing highly reflective surfaces with the Crime-lite AUTO:
1: Use Magnetic Polarisation Filters for the Light Source and Camera.
Magnetic polarising filters can be added to both the camera lens and wide-angle illumination arms of the Crime-lite AUTO. When a polarising filter is applied to a light source, the light emitted vibrates in a single plane meaning that, when this polarised light hits a surface, the way it reflects, refracts, and scatters changes compared to unpolarised light. By viewing or photographing the scene through another polarising filter (either aligned or, in some cases, without one), you can selectively filter the light you see or capture, helping to significantly reduce or even remove glare entirely.
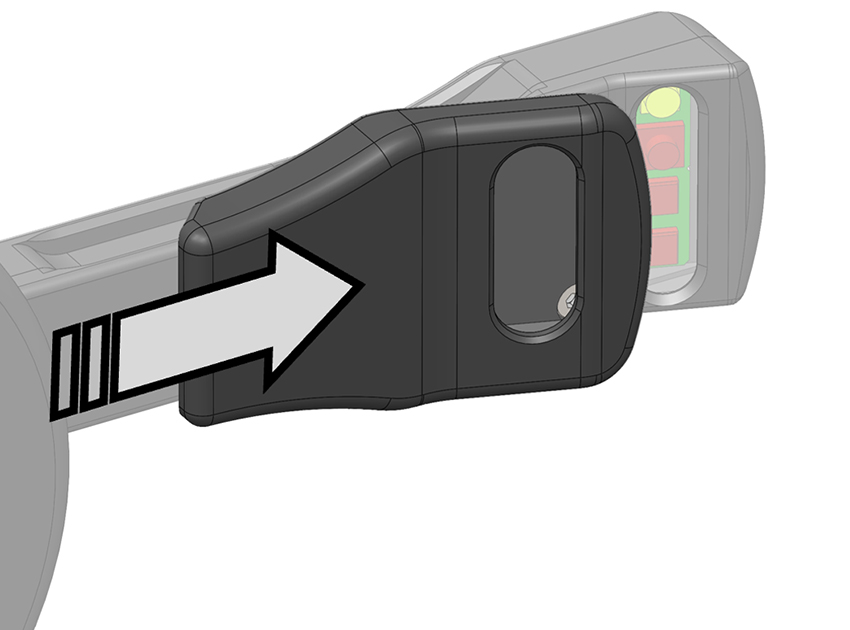
Image: Polarising filter applied to Crime-lite AUTO illumination arms
2: Cross Polarisation
Cross polarisation occurs when the polarising filter on the light source is oriented at a 90-degree angle to the one on the camera lens. Cross-polarisation can help to enhance contrast by reducing the scattered light and reflections, and to reveal details that are just below the surface. With the Crime-lite AUTO, this can be achieved by rotating the dial on the front of the camera lens polarising filter.
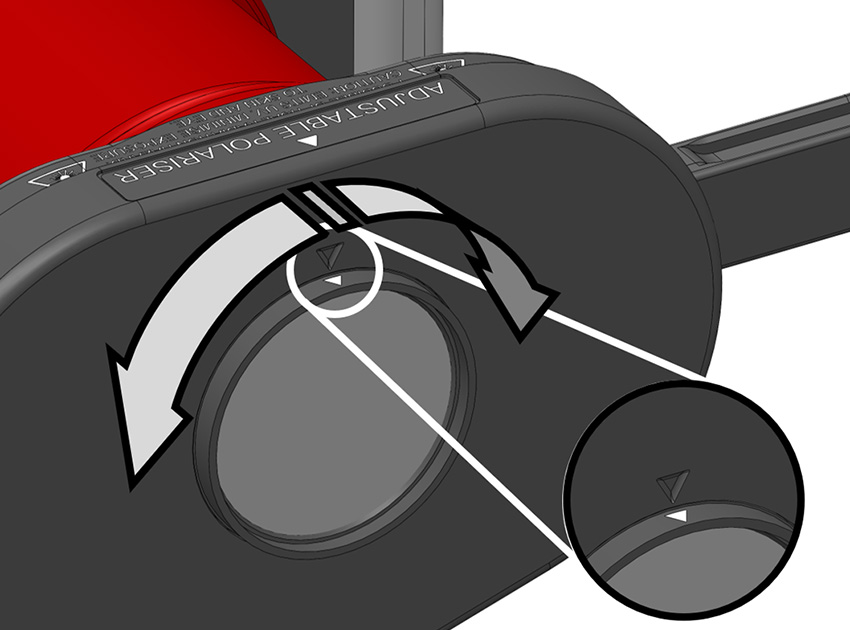
Image: Polarised lens adjustment dial on Crime-lite AUTO
3: Experiment with Angles
While cross-polarisation involves a 90-degree orientation between the filters, slightly adjusting the angle of the light source and the camera can sometimes further optimise the reduction of glare and the enhancement of detail. We recommend experimenting as a few degrees can make a significant difference to the clarity of photograph you are able to capture.
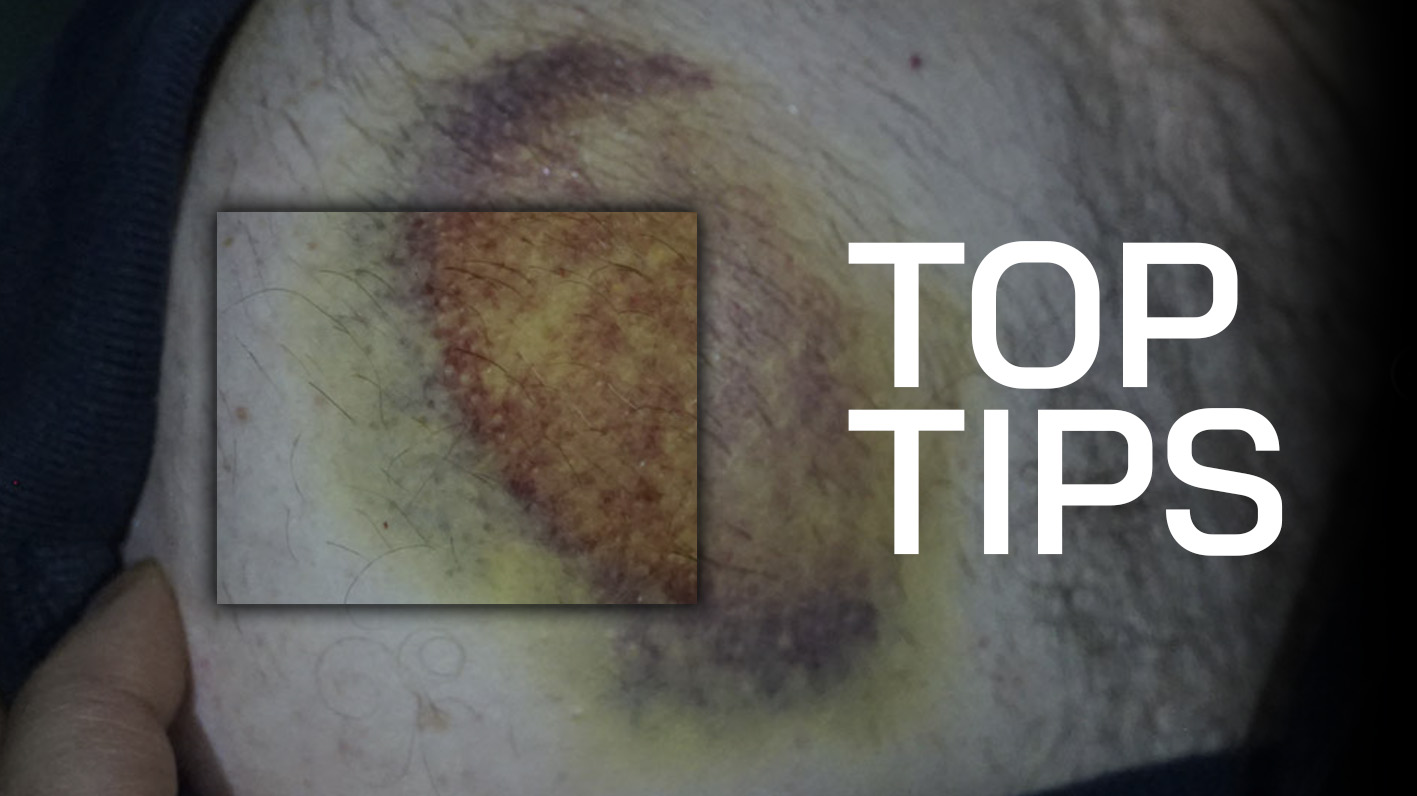
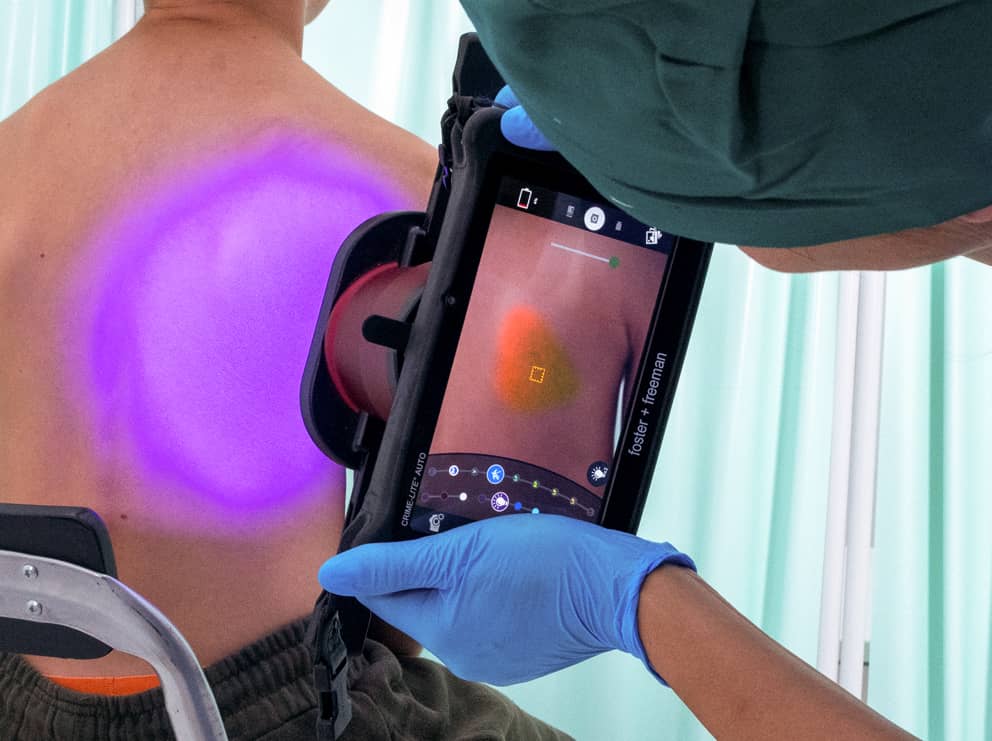
Image: Crime-lite AUTO polarising kit used to increase contrast when examining bruising
Learn about the Crime-lite AUTO Polarising Lens Kit
A simple and effective accessory for the Crime-lite AUTO, these clip-on LED filters and adjustable polariser lens have been designed to improve results, particularly when conducting examinations of human skin. Click below or watch the video guide to learn more.
Learn more about Crime-lite
With the Crime-lite range of forensic light sources, foster+freeman has pioneered the use of high-intensity LED illumination for the search, detection, and examination of forensic evidence both at the crime scene and in the forensic laboratory.
WEBINAR – Taking the Lab to the Scene: Advances in Mobile Forensics
Join us for this free on-demand webinar, where we explore the latest advancements in mobile forensics and delve into the revolutionary technologies transforming crime scene investigations.
